User Guide
How to Get a More Stable GPS Location Simulation Experience
Sometimes, you may need a more stable location simulation experience. For this, you can use the DNS Private service we provide.
Each order includes an available License Code. You can use this License Code on the following website:
This tutorial explains the complete process:
- Get your License Code
- Generate a stable DNS Profile file
- Install the DNS Profile file on your iPhone
- Complete the stable location simulation setup
Step 1: Log in to your store account
First, log in to your account on our store website.
After logging in, click your username in the upper-right corner of the website.
This will take you to your user Dashboard.
Step 2: Get the DNS Priva License
In your Dashboard, you will see a DNS Priva License button.
Click DNS Priva License to open the License Code page.

Step 3: View and copy your License Code
On the License Code page, you can see:
- Your License Code
- The current status of the License Code
- The number of times the License Code has been used
- The number of times you can request a new License Code

Please note:
- Each License Code has 2 download attempts by default
- If you request a new License Code, the old License Code will become invalid immediately
Now Copy your available License Code.
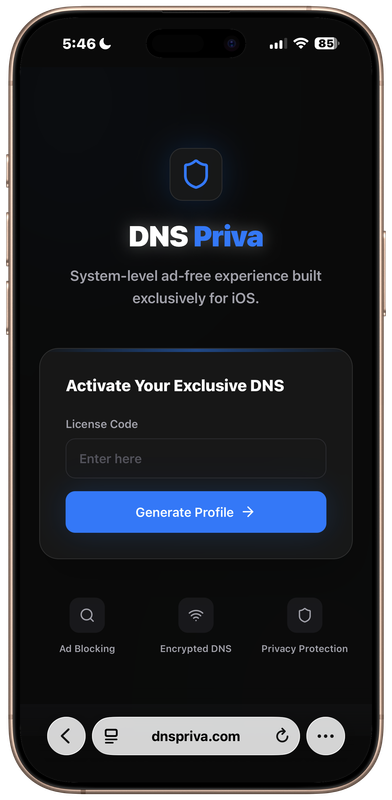
Step 4: Open DNS Priva on iPhone Safari
On your iPhone, open the built-in Safari browser.
Go to:
Step 5: Generate the stable DNS Profile
Paste your License Code into the input box on the DNS Priva website.
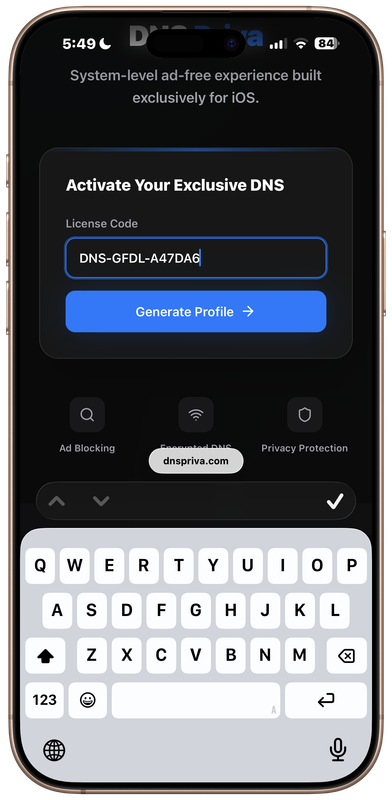
Then tap:
Generate Profile
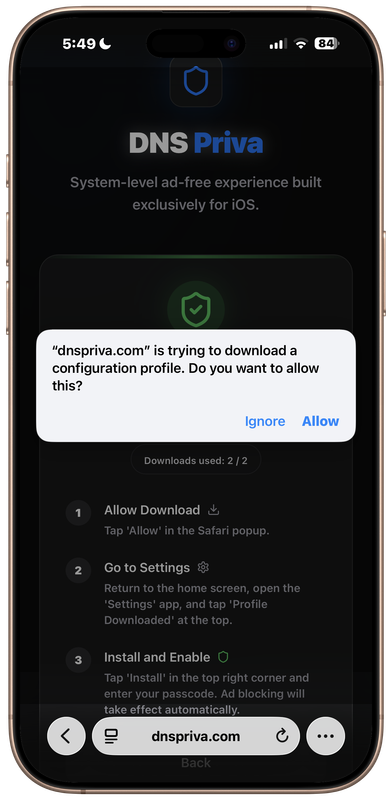
The website will generate and download a Profile file.
After the download is complete, continue to the next step.
Step 6: Open iPhone Settings
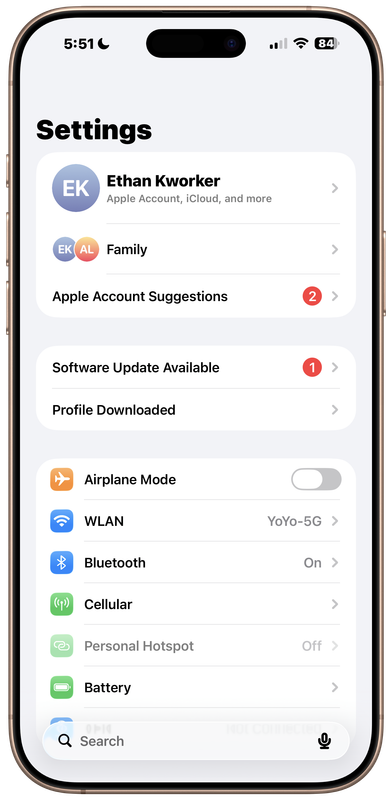
After downloading the Profile file, open Settings on your iPhone.
You should see:
Profile Downloaded
Tap Profile Downloaded to open the installation page.
Step 7: Install the DNS Privacy Profile
On the Profile installation page, tap:
DNS Privacy
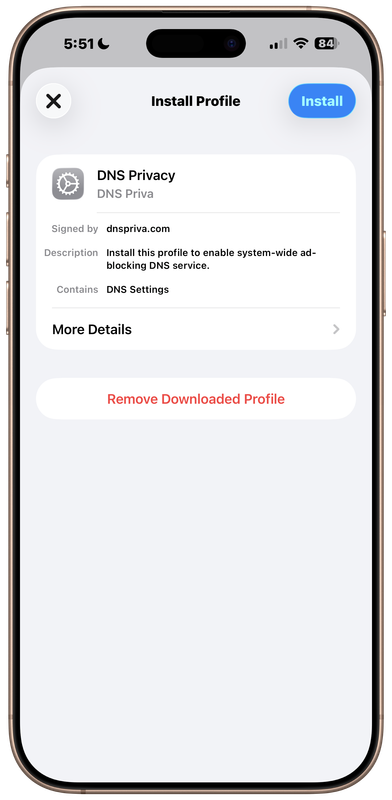
Then tap Install in the upper-right corner.
Your iPhone will ask for your device passcode.
Enter your iPhone passcode to continue.
Step 8: Confirm installation
After entering your passcode, tap:
Install
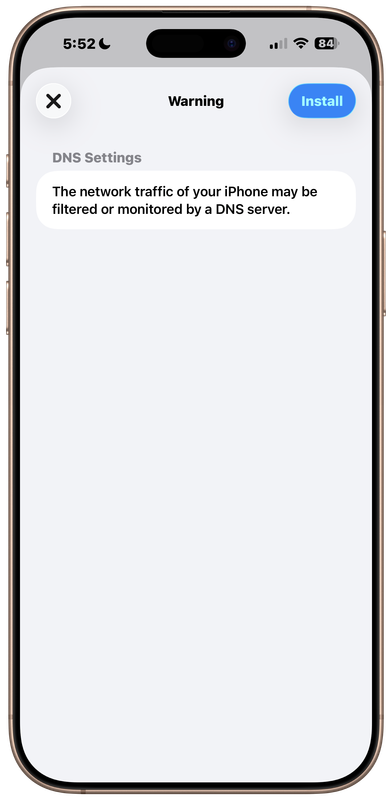
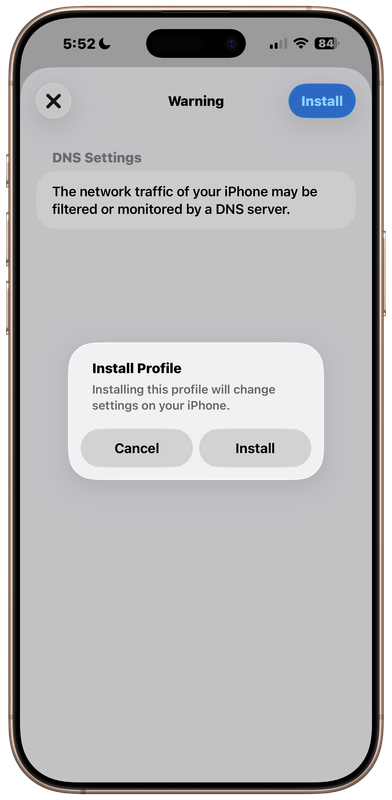
When the confirmation window appears, tap:
Install
again.
Then tap the checkmark or completion button in the upper-right corner.
Setup complete
Your stable DNS Profile file has now been installed on your iPhone.
You can go to the Settings – General – VPN & Device Management to check that the Restrictions and Proxies is setted to DNS Privacy DNS
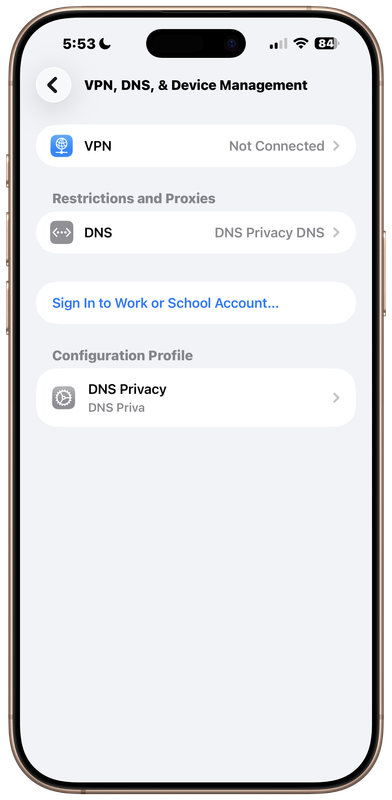
You can now use it for a more stable location simulation experience.
Important Note:
Do not remove the DNS Privacy Configuration Profile. If you want to temporarily stop using this DNS Stable service, simply go to this page, enter DNS Privacy DNS, and select Automatic. Of course, you can reselect DNS Privacy DNS at any time to re-enable the service. If you delete it, you will need to download and install it again, and the number of installations is limited — by default, you only have two attempts.
Video Tutorial for DNS Priva
Or Watch this video directly on Youtube: https://www.youtube.com/watch?v=eToiqh6RWN4
Full workflow summary
1. Log in to your store account
2. Click your username in the upper-right corner
3. Open your Dashboard
4. Click DNS Priva License
5. Copy your available License Code
6. Open https://dnspriva.com/ in iPhone Safari
7. Paste the License Code
8. Tap Generate Profile
9. Download the Profile file
10. Open iPhone Settings
11. Tap Profile Downloaded
12. Open DNS Privacy
13. Tap Install
14. Enter your iPhone passcode
15. Tap Install again
16. Tap the checkmark or completion button in the upper-right corner


